
The real cost of roof bars isn’t the purchase price—it’s the hidden fuel penalty, potential paint damage, and load limit miscalculations that catch owners off guard.
- Factory fixed points handle 100kg+ loads while basic aftermarket rails often max out at 75kg with significant safety margins required.
- Empty bars alone slash fuel economy by 11% on highways, creating $400+ annual hidden costs through car wash restrictions and UV degradation.
Recommendation: Calculate your true dynamic load capacity by subtracting bar and box weight from your vehicle’s roof rating before purchasing any cargo system.
You have packed everything for the family vacation—luggage, sports gear, camping chairs—but the trunk closes only with brutal force, if at all. For millions of drivers facing this spatial crunch every summer, roof bars appear as the obvious salvation. Yet the market floods you with options: aluminum versus steel, flush versus raised rails, aerodynamic versus square profiles. Most guides focus on brand comparisons and price points, treating this as a simple accessory purchase.
But the reality is mechanical and economic. The wrong mounting system doesn’t just whistle annoyingly on the highway; it micro-scratches your paint, invalidates your warranty, and costs you hundreds in hidden fuel penalties annually. The critical question isn’t which bar looks best, but which system respects your vehicle’s structural limits while minimizing long-term ownership costs.
This guide dismantles common assumptions about roof load ratings, exposes the true financial impact of leaving bars installed year-round, and provides concrete protocols for avoiding the height-clearance disasters that destroy equipment. From calculating dynamic forces during emergency braking to protecting your interior floor when converting your car into a temporary van, here is how to expand your cargo capacity without compromising your vehicle integrity.
Before diving into the technical specifications, let us examine the structural foundation of your roof system and why your vehicle’s factory mounting points determine everything else about safe load carrying.
Table of Contents: Selecting Roof Bars Without Damaging Your Vehicle
- Open Rails, Integrated or Fixed Points: Which Mounting Foot for Your Roof?
- Why Do Your Roof Bars Whistle and How to Stop the Noise?
- 75kg Limit: Do You Count the Weight of the Bars and Box in It?
- How Much Does Leaving the Bars Empty All Year Cost You?
- The Height Forgetfulness That Tears Everything Off: How to Never Get Caught Out?
- Roof Box and Bars: How Much Do They Really Cost You in Fuel on the Highway?
- How to Protect the Entire Floor When You Turn Your Car Into a Van?
- Hard or Soft Roof Box: Which One Will Survive Your Winter Vacation?
Open Rails, Integrated or Fixed Points: Which Mounting Foot for Your Roof?
Not every roof can handle cargo, and not every rail you see is structural. Vehicle manufacturers install three distinct mounting systems, each with radically different load-bearing capabilities. Factory fixed points—those hidden anchor points under small plastic covers—typically support 100kg or more according to industry testing data, while aftermarket clamp-on systems for vehicles with bare roofs usually max out at 75kg. This distinction determines whether you can safely carry a rooftop tent or merely a pair of skis.
Raised rails, the longitudinal bars running front to back, offer the most flexibility. You can slide crossbars anywhere along their length for optimal load distribution. Flush rails sit nearly level with the roof panel, looking sleek but limiting mounting positions. Fixed points provide the strongest connection but require specific foot packs. The danger lies in decorative rails—cosmetic strips that look structural but flex under pressure and lack internal reinforcement.
Your Action Plan: Identifying Structural Load-Bearing Rails
- Check if you can slide a finger underneath the side rail—raised rails with genuine load capacity always have clearance for clamp mechanisms.
- Look for factory mounting point covers; small plastic doors on the roof indicate fixed structural points rated for heavy loads.
- Test the rail flexibility by pressing firmly; decorative rails flex visibly while structural ones remain rigid under hand pressure.
- Verify manufacturer specifications in your vehicle manual; load ratings above 75kg indicate genuine structural capability.
- Examine mounting hardware from inside the vehicle; structural rails show reinforced attachment points with visible bolts or backing plates.
Choosing the wrong foot type creates catastrophic failure points. Clamp systems on bare roofs concentrate stress on small sheet metal areas, while incorrect torque settings on fixed points strip internal threads. Always match your foot pack to the specific rail type identified in your vehicle manual.
Selecting the correct mounting system prevents structural damage, but aerodynamic design determines whether your highway journey becomes a screaming nightmare of wind noise and driver fatigue.
Why Do Your Roof Bars Whistle and How to Stop the Noise?
That high-pitched whistle isn’t just annoying—it is a measurable drain on driver alertness. Testing documented that persistent 75-85dB wind noise from poorly positioned roof bars increases cognitive fatigue on drives exceeding three hours, degrading reaction times equivalent to mild sleep deprivation. The cause is simple physics: square bars and awkward crossbar spacing create turbulence that converts smooth airflow into chaotic vortices.
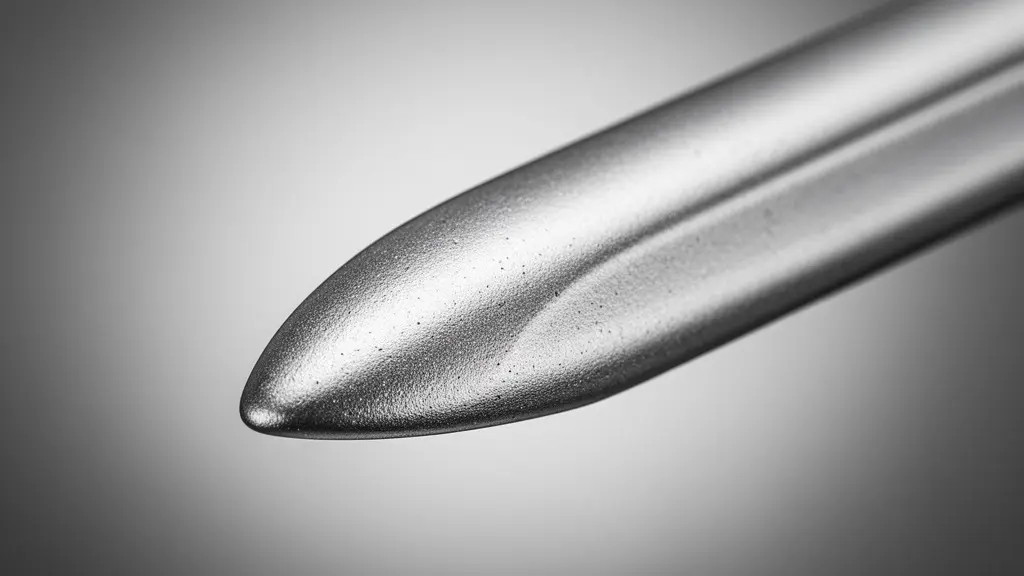
As shown in the image above, modern wing-shaped profiles slice through air rather than battering it. The teardrop cross-section channels airflow smoothly across the surface, eliminating the eddies that cause acoustic resonance. Positioning matters equally: bars spaced at specific intervals relative to your windshield angle can either harmonize with airflow or create destructive interference patterns that amplify noise.
The solution requires strategic positioning and aerodynamic design. Wing bars reduce drag coefficients significantly compared to traditional square profiles. Additionally, installing wind fairings—small plastic deflectors mounted forward of the front bar—laminates airflow before it hits the primary obstacle. Rubber strip inserts in the bar channels also prevent the « singing » effect caused by air vibrating through hollow sections.
Once you have selected quiet, aerodynamic bars, you must confront the mathematics of load limits—a calculation error that destroys roofs and voids insurance policies.
75kg Limit: Do You Count the Weight of the Bars and Box in It?
The 75kg sticker in your vehicle manual is not the actual cargo limit—it is the maximum dynamic load the roof structure can withstand during emergency maneuvers. When you brake hard at highway speeds, forces multiply dramatically. Dynamic testing reveals that emergency braking generates 2x multipliers on static loads, while cornering forces create 1.5x stress multipliers. That 75kg capacity becomes 150kg of effective force during a panic stop.
| Load Type | 75kg Static Rating | Actual Force at 70mph | Safety Factor |
|---|---|---|---|
| Emergency Braking | 75kg | 150kg+ | 2x multiplier |
| Cornering Forces | 75kg | 112kg | 1.5x multiplier |
| Highway Cruising | 75kg | 90kg | 1.2x multiplier |
| Stationary/Parking | 75kg | 75kg | 1x (no multiplier) |
Crucially, you must subtract the tare weight of your equipment. A typical aluminum crossbar set weighs 4-8kg, while an empty roof box adds 15-25kg. That 75kg limit suddenly becomes 42-56kg of actual cargo capacity. Loading beyond these margins risks crushing the roof structure, loosening the mounting feet, or—worst case—shearing the attachment points during evasive maneuvers.
Your Safety Checklist: Proper Load Calculation Protocol
- Check your vehicle manual for the roof load rating (dynamic weight limit) and record the specific kilogram figure.
- Weigh your crossbars on a bathroom scale; typically 4-8kg for aluminum sets, 6-12kg for steel.
- Weigh your roof box or carrier empty; most hard shells range 15-25kg, soft bags 3-5kg.
- Calculate remaining capacity using: Vehicle limit minus bars weight minus box weight equals available cargo weight.
- Position load center-mounted between the bars to minimize leverage stress on mounting points.
- Verify total weight remains under 75% of rated capacity to maintain safety margins for unexpected forces.
Understanding weight limits protects your roof mechanically, but leaving bars mounted permanently creates a different kind of damage—one measured in fuel receipts and paint correction bills.
How Much Does Leaving the Bars Empty All Year Cost You?
The convenience of permanent installation hides significant financial drains beyond the obvious fuel penalty. Consumer Reports testing found that empty roof racks slash fuel economy by 11% at highway speeds, translating to roughly 5 mpg loss on average vehicles. Over 15,000 annual miles, that inefficiency costs approximately $200-400 in additional fuel depending on local prices.
However, the hidden costs extend further. Year-round exposure forces owners into expensive hand car washes ($25-40 per visit) rather than automated tracks ($8), since rotating brushes snag on bars. UV degradation yellows polycarbonate components and fades rubber gaskets, reducing resale value by up to 60% within 18 months. Most critically, micro-movement between rubber pads and paint creates swirling scratches that require professional correction costing $800+ before vehicle resale.
The economic calculation favors seasonal installation. Modern clamp systems install in under 10 minutes with practice. Removing bars when not carrying cargo preserves both your fuel budget and your clear coat. Store them horizontally in a garage to prevent warping, and inspect rubber pads quarterly for grit accumulation that acts like sandpaper against your roof.
While financial costs matter, nothing compares to the instant devastation of misjudging your vehicle’s total height with bars installed.
The Height Forgetfulness That Tears Everything Off: How to Never Get Caught Out?
A moment of distraction entering a parking garage or drive-through creates thousands of dollars in damage within seconds. The added height from roof bars—typically 5 to 15 centimeters depending on the profile—transforms your vehicle’s clearance envelope dramatically. Without systematic reminders, even experienced drivers forget the modified dimensions during daily driving.
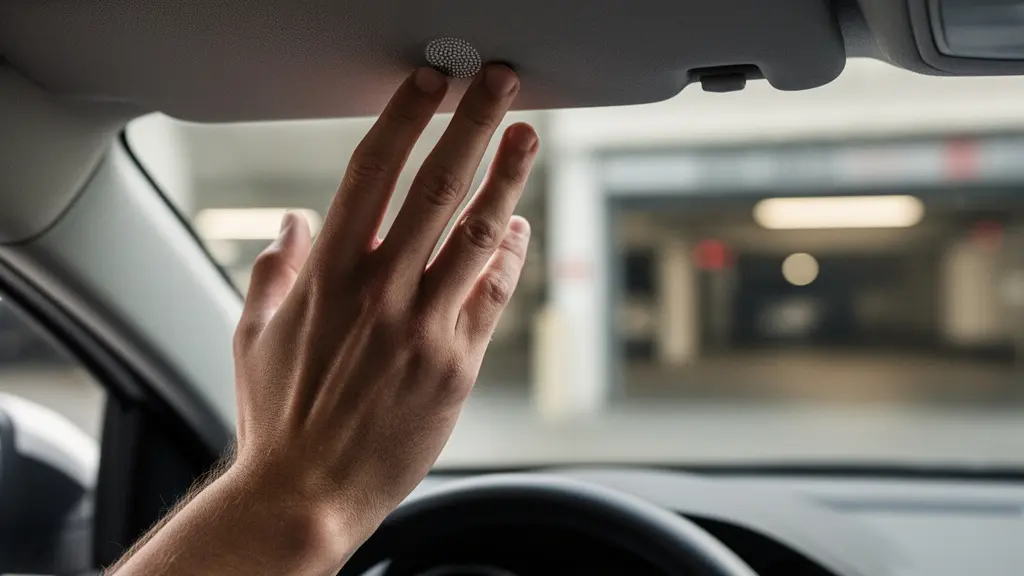
This interior perspective demonstrates the most effective reminder: tactile triggers placed where your hand naturally moves. A textured adhesive dot on the sun visor creates unconscious height-checking behavior every time you flip it down. Combined with digital safeguards, these physical cues prevent the cognitive gaps that destroy equipment.
Your Protection Protocol: Height Awareness System Setup
- Configure GPS to RV/Large Vehicle mode by entering your total vehicle height including bars (typically +15cm) into navigation settings.
- Install tactile reminder by placing textured stickers on both sides of the sun visor as physical height-check triggers.
- Program garage door opener if equipped with vehicle profiles; set specific alert tones when detecting your modified height configuration.
- Add height label by placing removable vinyl stickers on the dashboard corner showing total height in both metric and imperial units.
- Create parking routine by always lowering the driver window before entering covered structures to listen for clearance and gauge spatial awareness.
- Use spotter system by assigning passengers as dedicated height clearance spotters when navigating unfamiliar low-clearance locations.
Pre-trip measurement prevents disaster. Record your total height with bars installed (vehicle manual height plus bar height plus any box) and keep this figure visible. When in doubt, exit and visually verify clearance rather than trusting posted heights that may not account for suspended pipes or snow accumulation.
Avoiding physical damage is crucial, but optimizing your fuel expenditure requires understanding exactly how speed and vehicle type interact with rooftop drag.
Roof Box and Bars: How Much Do They Really Cost You in Fuel on the Highway?
Aerodynamic penalties vary dramatically based on your powertrain and velocity. Testing data shows electric vehicles suffer 20-30% range loss with roof boxes installed, while internal combustion engines face 5-10% fuel consumption increases. This disparity occurs because EVs have limited energy reserves and higher sensitivity to drag coefficients, whereas gasoline engines maintain efficiency across broader load ranges.
| Speed | Sedan (Corolla) | SUV (Explorer) | Impact Type |
|---|---|---|---|
| City (25-35 mph) | 8.8% increase | 2.5% increase | Minimal aerodynamic effect |
| Highway 55 mph | 15% increase | 4.5% increase | Moderate drag penalty |
| Highway 75 mph | 20.8% increase | 6.2% increase | Exponential drag increase |
The data reveals exponential penalty curves. At low speeds, mechanical rolling resistance dominates, masking aerodynamic drag. Above 55 mph, drag forces increase with the square of velocity, making roof boxes disproportionately expensive on fast highways. Sedans suffer worse than SUVs because their lower baseline drag makes added turbulence more significant proportionally.
Mitigation strategies include removing boxes when empty, driving at moderate speeds (60-65 mph optimal), and choosing low-profile cargo bags over rigid boxes when carrying soft items like clothing. Every 5 mph reduction above 60 mph significantly reduces the aerodynamic penalty.
Sometimes the smartest cargo solution avoids the roof entirely, converting your interior space while protecting your factory flooring from damage.
How to Protect the Entire Floor When You Turn Your Car Into a Van?
Before defaulting to roof mounting, consider interior cargo conversion. Real-world testing comparing 100kg loads revealed distinct handling trade-offs: roof loading raises the center of gravity affecting roll stability but improves braking distances by 8-12% due to weight transfer physics. Conversely, interior loading compresses rear springs directly, affecting headlight aim and creating uneven tire wear patterns over time, though it eliminates aerodynamic drag penalties entirely.
Converting your hatchback or wagon into a temporary cargo van requires floor protection beyond factory mats. Heavy objects slide during acceleration and braking, abrading carpet fibers. Sharp edges compress padding, creating permanent dents. Spills from camping gear or sports equipment stain permanently without barriers.
Your Floor Protection Strategy: Interior Cargo System
- Use inflatable gap fillers between folded rear seats to create perfectly level loading surfaces without removing factory seats.
- Install heavy-duty rubber cargo mats with raised 3cm edges to contain spills and protect original carpeting from abrasion.
- Add tie-down anchor points using existing seat mounting bolts with eyelet hardware, maintaining factory warranty integrity.
- Create modular plywood platforms covered in indoor/outdoor carpet that distribute weight across the floorpan without permanent modification.
- Install LED strip lighting along cargo area sides for visibility when loading equipment during nighttime arrivals.
- Add ventilation by keeping rear windows cracked 2cm with security guards installed, preventing condensation buildup on sensitive gear.
This approach works best for bulky, lightweight items like sleeping bags, clothing bins, and collapsible furniture. Reserve the roof for dirty, wet, or odor-producing cargo like bikes, skis, or fuel containers that you do not want inside the cabin.
Key Takeaways
- Always subtract equipment weight (bars 4-8kg, boxes 15-25kg) from your vehicle’s roof rating before loading cargo.
- Remove roof bars when not in use to prevent 11% fuel penalties and $800+ paint correction costs from UV degradation.
- Use tactile dashboard reminders and GPS large-vehicle modes to prevent height clearance disasters in parking structures.
Hard or Soft Roof Box: Which One Will Survive Your Winter Vacation?
Winter conditions expose critical differences between cargo solutions. Hard-shell ABS boxes contract approximately 0.5% in sub-zero temperatures, risking latch jamming and seal gaps as plastic stiffens. Soft PVC bags maintain flexibility to -40°C but offer minimal security against theft and vulnerability to road salt abrasion.
| Feature | Hard Box (ABS) | Soft Box (PVC) |
|---|---|---|
| Sub-zero flexibility | 0.5% contraction, latch jamming risk | Maintains flexibility to -40°C |
| Theft vulnerability | Requires loud pry tools | 400% more likely to be targeted (silent cutting) |
| Rear visibility | Creates turbulent wake depositing road grime | Lower profile, less wake turbulence |
| Aerodynamic penalty | Higher due to fixed shape | Can compress when empty for less drag |
| Load protection | Superior weather protection | Adequate but risk of water seepage |
For ski trips and winter sports, hard boxes protect equipment from road spray and freezing rain, but require pre-warming locks with graphite lubricant to prevent freezing. Soft bags work for clothing and soft gear but demand internal waterproof liners and positioning behind the rear windshield to minimize salt exposure. Security concerns favor hard shells for unattended parking at trailheads, while soft bags suit budget-conscious travelers prioritizing storage convenience over theft protection.
Ultimately, the choice depends on your specific cargo vulnerability—electronic devices and cameras demand hard shell protection, while bulky clothing and sleeping bags tolerate soft containers. Consider removable hard boxes for winter, storing them during off-seasons to maximize vehicle efficiency.
Evaluate your typical cargo weight, seasonal usage patterns, and garage clearance constraints before investing. The right system balances accessibility, protection, and long-term ownership costs while expanding your vehicle’s utility without compromising its structural integrity or your safety on the road.