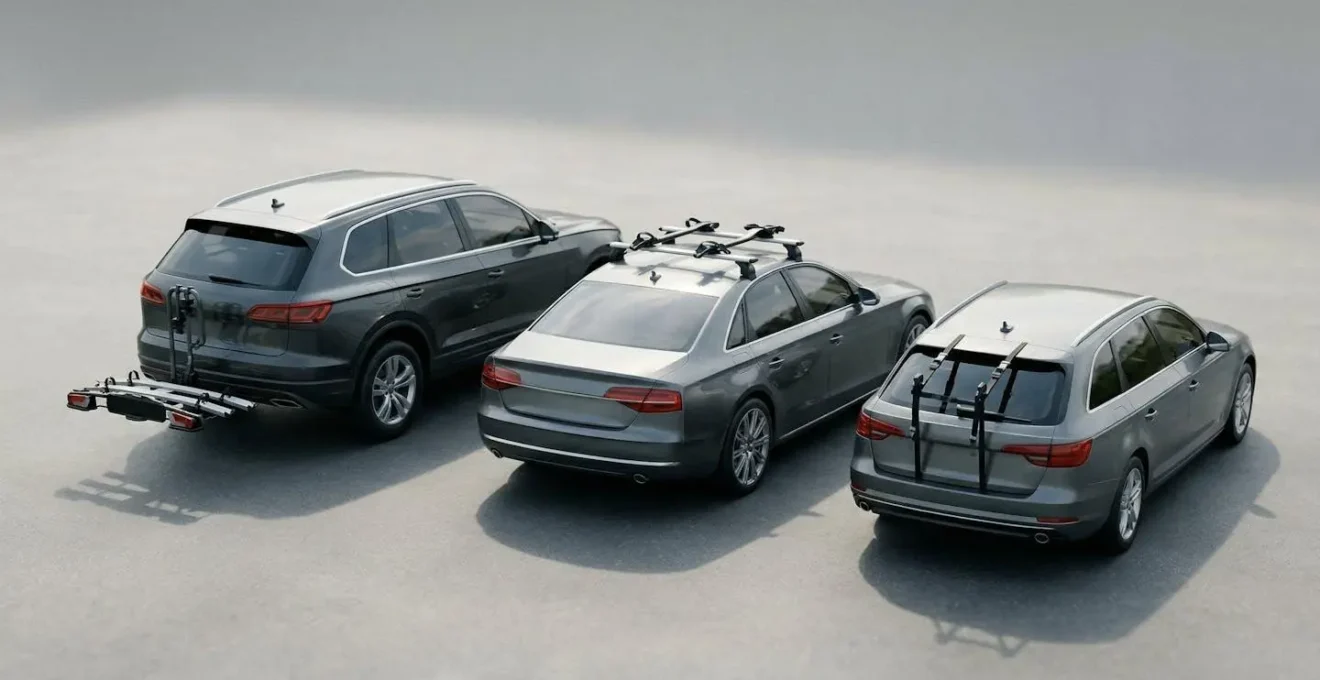
Choosing a bike rack is less about features and more about mitigating specific, costly risks to your car, your bikes, and your legal standing.
- Trunk racks pose a high risk of vehicle damage and failure under the dynamic load of heavy e-bikes.
- Frame-clamp racks can cause irreversible damage to modern carbon fiber or thin-walled aluminum bikes.
- Obscuring your license plate or lights is not a minor infraction but a guaranteed fine in most jurisdictions.
Recommendation: Prioritize hitch-mounted platform racks that hold bikes by the wheels, especially for e-bikes or carbon frames, and always use a light board if your plate or signals are obscured.
For any passionate cyclist, the equation seems simple: car plus bike rack equals freedom. The open road calls, and your trusty two-wheeled companion is coming along. You’ve likely browsed the options, weighing the cost of a trunk rack against the stability of a hitch system or the aerodynamics of a roof mount. The common advice focuses on budget, ease of use, and how many bikes you can carry. But this is where most buyers make their first, and often most expensive, mistake.
The real decision isn’t about convenience; it’s about risk management. The wrong bike rack can do more than just transport your bike—it can scratch your car’s paint, buckle under the weight of an e-bike, crush a fragile carbon frame, and earn you a hefty fine for an obscured license plate. These aren’t edge cases; they are the predictable outcomes of choosing a rack based on its price tag rather than its engineering. We often hear about checking weight limits, but rarely do we discuss the immense dynamic forces at play when you hit a pothole, or the subtle but destructive pressure of a clamp on a modern frame.
What if the key isn’t just to carry your bike, but to do so without compromising the integrity of your vehicle, your bike, or your safety on the road? This guide shifts the perspective. We will move beyond the superficial pros and cons and dive into the critical failure points of each system. We’ll analyze the physics, the legal liabilities, and the material science that should inform your choice.
By dissecting the most common (and costly) errors, this article provides a clear framework for selecting a bike rack that offers not just transportation, but true peace of mind. We will explore why your license plate’s visibility is non-negotiable, how dynamic loads can destroy a lesser rack, the correct way to secure a delicate frame, the real value of trunk access, and how your driving must adapt to the new physics of your vehicle.
This article provides a comprehensive overview of the critical factors to consider when selecting and using a bike rack. Follow the summary below to navigate through the key risks and solutions for transporting your bicycle safely and legally.
Summary: A Strategic Guide to Selecting Your Bike Rack
- Why Hiding Your License Plate with Bikes Is a Guaranteed Fine
- Why Your Trunk-Mounted Rack Might Buckle Under the Weight of Two E-Bikes
- How to Tighten Clamps Without Crushing Your Fragile Bike Frame
- Is a Tilting Bike Rack Really Worth the Extra Cost for Trunk Access?
- Bumps and Turns: How to Adapt Your Driving with 40kg Cantilevered
- Why 1.5 Meters Is the Vital Minimum, Even at Low Speed
- The Burnt-Out License Plate Bulb That Fails 15% of Cars Unnecessarily
- How to Safely Pass a Cyclist Without Risking a 3-Point Penalty
Why Hiding Your License Plate with Bikes Is a Guaranteed Fine
One of the most overlooked aspects of using a rear-mounted bike rack is its potential to obscure the vehicle’s license plate and lights. This isn’t a minor detail; it’s a direct violation of traffic laws in most places, viewed by law enforcement as a primary issue, not an afterthought. The core principle is that a vehicle’s identification and its driver’s intentions (via brake lights and turn signals) must be visible at all times. A bike, or the rack itself, blocking this information creates a significant liability blackspot for the driver.
The penalties for this offense are not trivial. Depending on the jurisdiction, fines for obscured license plates can range from $100 to over $197, and can sometimes include demerit points against your license. It’s a costly and entirely avoidable problem. The argument that the obstruction is temporary or unintentional rarely holds up, as the responsibility for ensuring vehicle compliance rests solely with the driver. Ignorance of the law is not a defense.
To remain compliant, the solution is straightforward. If any part of your license plate or rear lights is covered when the rack is loaded, you must take corrective action. This typically involves using a supplemental light board, which is a unit that displays your license plate and replicates your vehicle’s brake lights and turn signals. These boards attach to the rack or the bikes themselves, ensuring full visibility. Some jurisdictions may have specific exemptions, but relying on them is risky without explicit confirmation.
Ultimately, a bike rack should provide convenience, not a legal headache. Before purchasing any rear-mounted system, your first consideration should be how it will interact with your plate and lights. Factoring in the potential cost of a light board and the hassle of a traffic stop makes « cheaper » racks that cause obstruction suddenly seem far more expensive.
Why Your Trunk-Mounted Rack Might Buckle Under the Weight of Two E-Bikes
The rise of e-bikes has introduced a new, critical variable into the bike rack equation: weight. A standard road bike might weigh 10kg (22 lbs), but a typical e-bike can easily top 25-30kg (55-66 lbs). Loading two of them onto a rack designed for lightweight bicycles is a recipe for disaster. The issue isn’t just the static weight; it’s the concept of dynamic load. While a rack might hold 50kg sitting in your driveway, the forces exerted when you hit a pothole or a speed bump at 60 km/h can multiply that weight three-fold or more, placing immense stress on the rack’s structure and its mounting points on your vehicle.
Trunk-mounted racks, which rely on straps and padded feet resting against the car’s body, are particularly vulnerable. They are rarely rated for the weight of even one e-bike. The straps can stretch or snap under sudden dynamic loads, and the metal hooks can deform the thin sheet metal of your trunk lid. The concentrated pressure from the rack’s feet can dent the bodywork or even crack the rear window if positioned incorrectly. The result can be catastrophic failure, with your expensive bikes and the rack itself detaching from the vehicle on the highway.
Case Study: The Rise in E-Bike Rack Failures
Transportation safety data highlights a concerning trend. As detailed in an analysis of bike transport regulations, bike rack-related incidents increased from an estimated 150 in 2018 to 275 by 2023. A primary cause is overloading racks with e-bikes that exceed the per-bike weight limit, often leading to structural failure. The analysis explains that a 50kg static load can exert forces equivalent to 150kg or more on the road, creating stress that exceeds the design limits of both the rack and the vehicle’s body panels.
This macro photograph shows the immense pressure on the mechanical components. Even on a well-built rack, signs of material fatigue can become apparent over time, especially when subjected to loads beyond its design specifications.
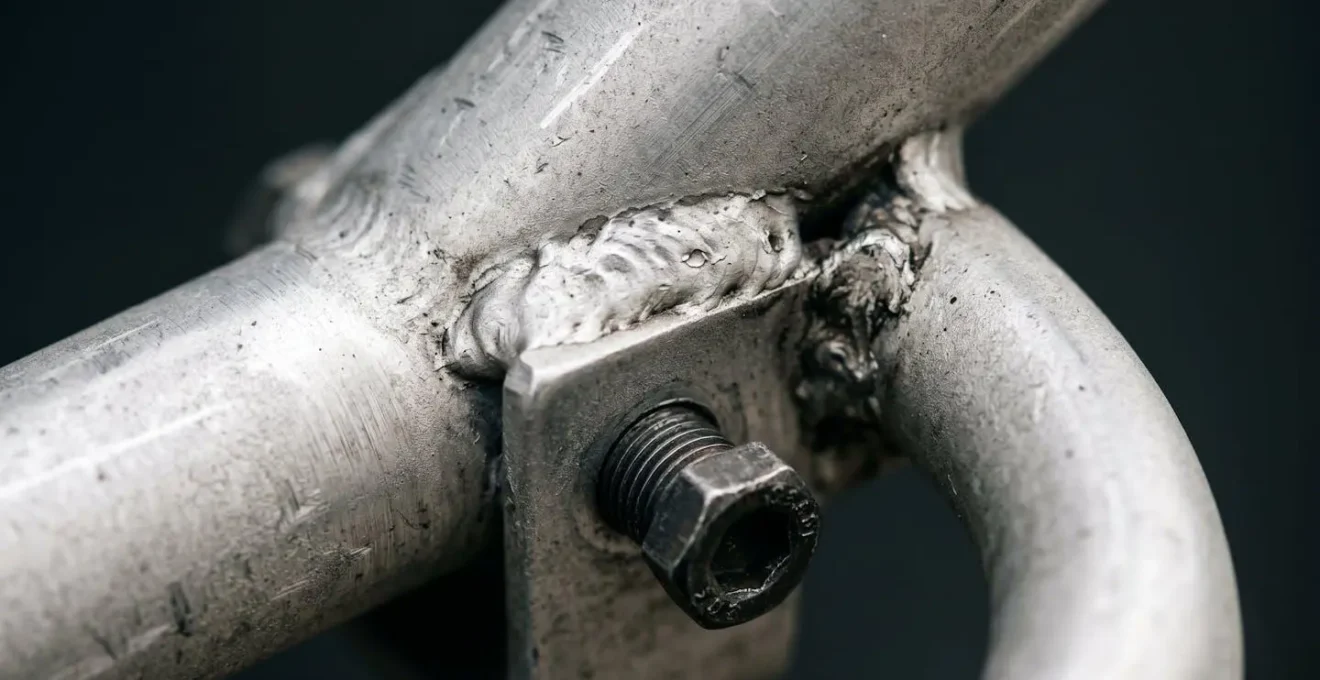
For anyone transporting e-bikes, a hitch-mounted platform rack is the only truly safe and appropriate solution. These racks are bolted directly to the vehicle’s frame via a trailer hitch, providing a far more robust and stable foundation. They have higher weight capacities and are specifically engineered to handle the heft and dynamic forces associated with heavy electric bicycles.
How to Tighten Clamps Without Crushing Your Fragile Bike Frame
After ensuring your rack can handle the weight, the next critical point of contact is between the rack and the bike itself. Here lies another hidden danger: frame damage. Many common bike racks, especially hanging-style hitch or trunk racks, secure the bike using a clamp that grips the top tube of the frame. While this works perfectly well for a sturdy steel or standard aluminum frame, it can be a death sentence for a high-performance carbon fiber or thin-walled aluminum frame.
These advanced frames are engineered to be incredibly strong and rigid against the forces of riding (vertical and torsional stress), but they are not designed to handle concentrated clamping pressure. Overtightening a frame clamp, or even just using one on a bumpy road where the bike jostles, can easily crush the tube, leading to micro-fractures that compromise the frame’s integrity. This damage is often not immediately visible and can lead to sudden, catastrophic failure of the bike frame while riding.
Carbon fiber and bike care experts are unanimous on this point. As one leading guide puts it:
Car racks that clamp to the frame tubes should not be used because of the enormous loads concentrated in a small area.
– Carl Hart, Carbon Bike Care Guide
The safe alternative is a rack that avoids contact with the frame altogether. Platform-style racks (which can be hitch or sometimes roof-mounted) secure the bike by its wheels, with a hook or arm that holds the front wheel in place. This method exerts zero pressure on the frame. Fork-mount racks, common on roofs, are also a safe option as they secure the bike by its dropouts. If you must use a clamp-style rack with a sensitive frame, the only potentially safe place to clamp is the metal seat post, never the frame itself.
This compatibility issue is so crucial that it’s worth consulting a detailed chart before making any purchase, as shown in this comparative analysis of rack systems.
| Frame Material | Bike Type | Frame Clamp Rack | Wheel-Hold Platform | Fork-Mount |
|---|---|---|---|---|
| Carbon Fiber | Road/MTB | ❌ Not Recommended | ✅ Ideal | ✅ Safe |
| Aluminum (thin-wall) | Road | ⚠️ Seat Post Only | ✅ Recommended | ✅ Safe |
| Aluminum (standard) | MTB/Hybrid | ✅ With Padding | ✅ Recommended | ✅ Safe |
| Steel | All Types | ✅ Safe | ✅ Safe | ✅ Safe |
| Step-Through | Commuter/E-bike | ❌ Needs Adapter | ✅ Ideal | ⚠️ May Need Adapter |
Is a Tilting Bike Rack Really Worth the Extra Cost for Trunk Access?
Once you’ve settled on a hitch-mounted rack for its stability and safety, a new question of convenience arises: to tilt or not to tilt? A standard hitch rack is a fixed structure; once it’s on, accessing your vehicle’s trunk or hatch is impossible without first removing the bikes and potentially the rack itself. This is where tilting and swing-away features come into play, but they come at a significant premium. The decision of whether it’s « worth it » depends entirely on your use case.
Modern racks offer a tiered system of access. The most basic « tilting » racks use a simple pin-pull mechanism, which requires you to support the weight of the rack and bikes while removing a pin, allowing it to pivot down. More advanced models feature foot-pedal or handle-release systems, often assisted by gas struts, making it a one-handed operation. The top tier includes swing-away systems, which pivot the entire loaded rack to the side of the vehicle, providing completely unobstructed access to the cargo area. The trade-off for this convenience is added complexity, weight, and cost.
For a cyclist on a day trip to a local trail, where the trunk is only opened before and after the ride, a non-tilting rack might be perfectly adequate. However, for families on a road trip, dog owners who need to let their pet out, or anyone making multiple stops where trunk access is needed, a tilting feature quickly moves from a « nice-to-have » to an essential. User reports consistently show high satisfaction with these features for anyone who regularly needs to get into their trunk mid-journey. Premium models offer even more convenience, with features like integrated wheels for moving the heavy rack around in your garage; for instance, some premium tilting racks like the Thule T2 Pro XTR weigh 52 pounds, making garage mobility a real consideration.
Ultimately, valuing this feature requires an honest assessment of your travel habits. If you imagine yourself repeatedly in a situation where you’re frustrated by a blocked trunk, the extra investment in a tilting or swing-away rack will pay for itself in saved time and hassle. It’s a clear case of paying for a solution to a future problem.
Bumps and Turns: How to Adapt Your Driving with 40kg Cantilevered
Installing the right bike rack is only half the battle; driving with it is a new skill in itself. Hanging 40kg (around 90 lbs) of bikes and metal off the back of your vehicle dramatically changes its driving dynamics. This added weight acts as a lever, creating a cantilever effect that alters the car’s center of gravity, affects suspension response, and increases its overall length. Ignoring these changes is a common mistake that can lead to accidents or damage.
The most immediate change is in handling. With the extra weight cantilevered behind the rear axle, the front of the car can feel lighter, potentially reducing steering responsiveness. When cornering, the added mass will create more body roll and can cause the rear to feel « loose. » You must adapt by taking turns more slowly and smoothly than you normally would. Sudden, sharp maneuvers should be avoided. Similarly, your braking distance will increase. The extra weight requires your brakes to work harder, so you must leave a larger gap to the car in front of you.
Navigating everyday obstacles also requires a new level of awareness. Speed bumps and dips in the road must be approached with extreme caution and at a much lower speed. The cantilevered weight will amplify the suspension’s movement, causing the rack to bounce. In a worst-case scenario, a severe bump can cause the rack to bottom out and strike the pavement, damaging both the rack and your bikes. You also need to be constantly mindful of your vehicle’s new length when parking or reversing. The bikes are now the rearmost point of your car, and they are often out of sight of your rearview camera’s default angle.
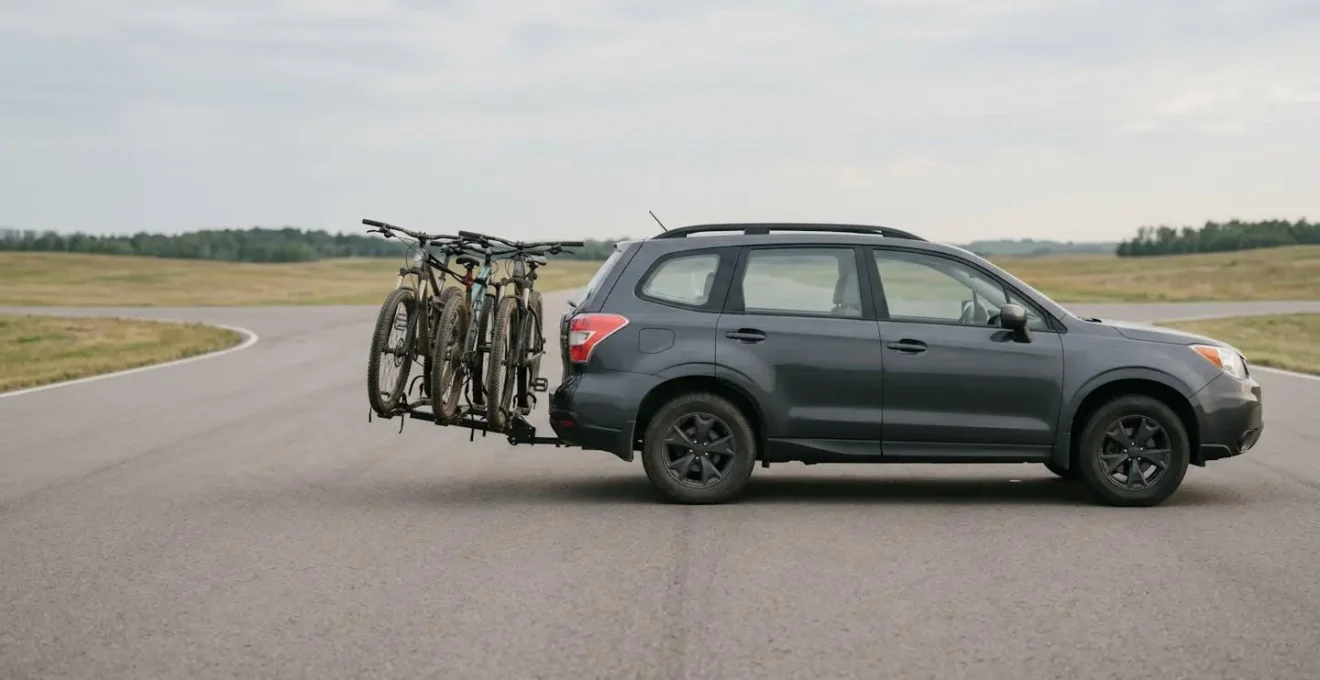
Before every single drive, a quick safety check is mandatory to ensure everything is secure and ready for the dynamic forces of the road. This isn’t just a recommendation; it’s a crucial habit for responsible transport.
Your Pre-Drive Safety Checklist
- Straps: Visually inspect and pull on all mounting straps. They must be tight with no signs of fraying, sun damage, or wear. For hitch racks, confirm the hitch pin is securely locked.
- Snaps and Clamps: Physically check that every frame clamp, wheel cradle, and locking mechanism is fully engaged and locked. Wiggle each component to ensure it’s not loose.
- Sway: Firmly push and pull on each bike. There should be minimal side-to-side or front-to-back movement. If there is significant sway, re-tighten all contact points and anti-sway straps.
- Signals: With the help of another person or by using reflective surfaces, turn on your lights and test your brake lights and turn signals to confirm they are fully visible and functional.
- Secure Load: Do a final mental check. Have you exceeded the rack’s total weight capacity or the vehicle’s maximum tongue weight? Is everything as secure as it can possibly be?
Why 1.5 Meters Is the Vital Minimum, Even at Low Speed
The concept of safety extends beyond your own vehicle. When you’re a motorist, sharing the road with cyclists requires a specific protocol, and the most critical rule is maintaining a safe passing distance. Many jurisdictions have legally mandated a minimum distance, often 1 meter or 1.5 meters (about 3 to 5 feet), when overtaking a cyclist. This isn’t an arbitrary number; it’s a buffer zone based on the physics of cycling and human reaction time.
A cyclist is not a static object. Even the most experienced rider is subject to small, unpredictable movements. They may need to swerve suddenly to avoid a pothole, a piece of debris, or a storm drain. A gust of wind can push them sideways. This « wobble zone » can easily be half a meter or more. Passing too closely leaves no margin for error. What might seem like a safe gap from inside a car can feel terrifyingly close to the vulnerable cyclist, and a slight misjudgment from either party can lead to a catastrophic collision.
The rule applies regardless of speed. Even in slow-moving city traffic, a close pass can be dangerous. A driver might not see a hazard that forces the cyclist to move, and a « mirror clip » incident can easily knock a rider off their balance and into the path of other traffic. The 1.5-meter minimum provides the necessary space for the cyclist to maneuver and for the driver to react if the cyclist does something unexpected. It’s a simple rule of mutual respect and a cornerstone of road-sharing safety.
When driving with a bike rack, this awareness should be even more heightened. You are part of the cycling community, and demonstrating best practices on the road is essential. Always give cyclists the full lane if necessary and wait for a safe, clear opportunity to pass with ample room.
The Burnt-Out License Plate Bulb That Fails 15% of Cars Unnecessarily
While a bike rack physically obscuring a license plate is a major violation, a more subtle but equally illegal issue is a non-illuminated plate. All jurisdictions require that a vehicle’s rear license plate be illuminated and legible from a certain distance at night. This is a common-sense rule that ensures a vehicle can be identified in all conditions. Yet, a simple burnt-out bulb is one of the most frequent and easily avoidable reasons for a traffic stop and a potential fine.
The problem is that the two tiny bulbs that light up the license plate are often forgotten during routine maintenance. They are small, inexpensive, and easy to replace, but because they provide no feedback to the driver (unlike a headlight), they can be out for months without notice. For law enforcement, a non-illuminated plate at night is a red flag. It can be an indicator of a poorly maintained vehicle or, in some cases, a deliberate attempt to obscure the plate’s identity.
This issue becomes even more critical when using a bike rack. If your rack and bikes are already partially shadowing the plate area, a working light becomes the only thing ensuring its legibility. A traffic stop for a plate obstruction could easily be compounded with a second ticket for the lack of illumination. The fines can be significant; in some jurisdictions, fines for an obscured or unlit plate can reach $110 and 3 demerit points. It’s a steep price to pay for a $2 bulb.
The solution is to incorporate checking your license plate lights into your regular routine. Every few weeks, turn on your headlights and walk to the back of your vehicle to confirm both bulbs are working. If you are using a supplemental light board with your bike rack, it’s even more important to ensure its lighting is fully functional before every trip. It’s a five-second check that can save you from a fine and an unnecessary roadside conversation.
Key Takeaways
- Risk Over Features: Choose a rack based on its ability to mitigate risks (damage, fines, failure) rather than just its price or feature list.
- Weight Matters Dynamically: For e-bikes or multiple heavy bikes, a hitch-mounted platform rack is the only safe option. Never trust a trunk rack with heavy loads.
- Protect the Frame: If you own a carbon fiber or thin-walled aluminum bike, use a rack that secures it by the wheels (platform) or fork, never one that clamps the frame’s top tube.
How to Safely Pass a Cyclist Without Risking a 3-Point Penalty
Safely overtaking a cyclist is a maneuver that requires more than just adhering to the minimum passing distance; it demands anticipation, patience, and a change in perspective. From a driver’s standpoint, the goal is to execute the pass smoothly and efficiently, but the overriding priority must be the safety and comfort of the vulnerable road user. A rushed or aggressive pass is not only dangerous but can also lead to significant penalties, including fines and demerit points.
The first step is to slow down and assess the entire situation. Don’t just focus on the cyclist; look far ahead. Is there oncoming traffic? Is the road narrowing? Are there upcoming intersections or driveways from which a car could emerge? Honking your horn is generally not advisable, as it can startle the rider and cause them to swerve unpredictably. Your presence should be calm and predictable.
When it is safe to pass, signal your intention early. Your move should not be a surprise to the driver behind you. Begin to move smoothly into the adjacent lane—not just straddling the line, but fully committing to the lane change as if you were passing another car. This ensures you will easily clear the 1.5-meter minimum distance. Maintain a steady speed as you pass; do not accelerate aggressively, as this can create a startling wind blast for the cyclist.
Crucially, do not cut back into your lane too early. Check your right-side mirror to ensure you can see the entire cyclist and their bike before you begin to merge back. A common mistake is to pull back in front of the cyclist too soon, forcing them to brake. The entire maneuver should be a long, gentle arc. If conditions do not allow for this type of safe, wide pass—due to traffic, a blind corner, or a solid center line—then you must wait. A few seconds of delay are infinitely better than a lifetime of regret or a costly penalty.
Now that you understand the critical risks and solutions associated with choosing and using a bike rack, the next step is to apply this knowledge. Evaluate your specific needs—your car, your bikes, your budget, and your typical travel style—and invest in the system that provides not just transportation, but total peace of mind on the road.