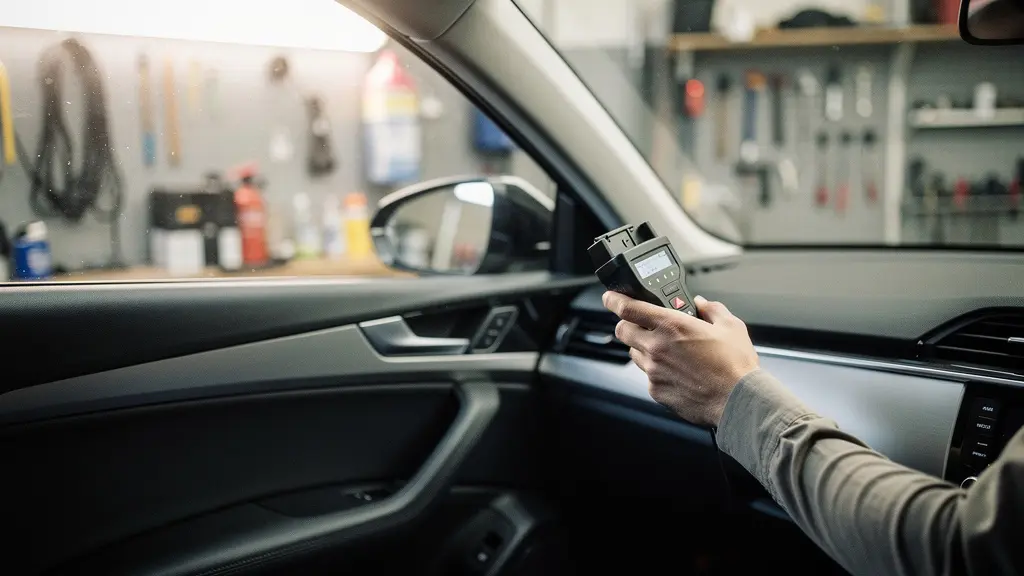
In summary:
- Rebooting is a temporary patch; the real fix is understanding your car’s digital ecosystem, including its software, power, and hardware logic.
- Diagnose issues systematically before trying a fix, whether it’s using a multimeter for parasitic drain or identifying a hardware failure like a faulty digitizer.
- Prevent future glitches through proactive protocols, such as setting up navigation before driving and being cautious with over-the-air (OTA) software updates.
- True mastery comes from managing the entire system, not just reacting to a single symptom on the screen.
That frozen map, the phantom touch that changes your music, the infuriating lag when you just want to adjust the climate—it’s a frustration every modern car owner knows. Your vehicle’s infotainment screen is the central nervous system of your driving experience, and when it fails, it feels like the entire car is broken. You’ve probably scoured forums and been told the same generic advice: « just restart the car, » « clean the screen, » or jump straight to the nuclear option of a factory reset. These are the equivalent of turning a computer off and on again; sometimes it works, but it rarely addresses the root cause.
The problem is that these simple fixes treat the symptom, not the disease. If you truly want to solve your infotainment issues and avoid a costly trip to the dealer, you need to adopt the mindset of an IT professional. The secret isn’t a single magic trick, but understanding that your car’s head unit is part of a complex digital ecosystem. It’s a network of interconnected modules governed by software protocols, power management rules, and data dependencies. A glitch on the screen could be a symptom of a weak wireless handshake, a power-hungry module that won’t go to sleep, or a flawed software update.
This guide will teach you the system logic behind the bugs. We’re moving beyond the simple reboot to give you a troubleshooter’s toolkit. We will explore how to establish a stable wireless connection for your phone, decide when to apply a software update, diagnose the real reason your battery is dying, and perform proper digital hygiene before selling your car. By understanding the ‘why’ behind the ‘what,’ you’ll gain the control to diagnose and fix issues yourself.
While this guide focuses on software and system-level fixes, sometimes the problem is purely physical. The following video demonstrates a detailed hardware repair on a specific Acura model, giving you a clear look at what’s involved in a digitizer replacement, which is often the culprit for touch-related issues.
To navigate this complex digital landscape, we’ve structured this guide to address the most common pain points an owner might face. Each section provides a professional-grade diagnosis and a clear action plan, helping you move from frustrated user to empowered troubleshooter.
Summary: Your Ultimate Guide to Car Infotainment Troubleshooting
- CarPlay or Android Auto sans fil : comment installer un adaptateur fiable ?
- Mise à jour à distance : faut-il la faire tout de suite ou attendre les retours ?
- Pourquoi votre batterie se vide-t-elle si la voiture reste garée 3 jours ?
- Comment effacer vos contacts et trajets GPS avant de vendre votre voiture ?
- Réparation d’écran tactile : l’alternative économique au remplacement complet
- L’erreur d’inattention liée aux écrans tactiles qui cause 30% des accrochages urbains
- Les supports magnétiques sont-ils assez puissants pour les gros smartphones ?
- Comment désactiver les alertes sonores intrusives sans compromettre la sécurité ?
CarPlay or Android Auto sans fil : comment installer un adaptateur fiable ?
Switching to a wireless CarPlay or Android Auto adapter feels like a simple upgrade, but it’s where many infotainment headaches begin. Constant disconnections, audio lag, and a non-responsive screen are often blamed on the car, but the true culprit is usually the adapter itself. Think of it as a translator between your phone and your car’s head unit. A cheap, poorly designed adapter creates a communication bottleneck. The key to a stable connection is a successful digital handshake—a process where both devices agree on a communication protocol. Inferior adapters fail at this repeatedly.
The stability of this connection is directly tied to the adapter’s processing power. Low-end adapters use generic, dual-core chips that struggle to handle the constant data stream of navigation and high-fidelity audio, leading to high latency. In contrast, premium adapters use more robust chipsets designed for this task. For instance, performance testing reveals that Qualcomm 8-core processors can reduce latency by up to 75% compared to their generic counterparts. This isn’t just about speed; it’s about reliability.
To ensure you choose and install a reliable adapter, follow a systematic compatibility check. It’s not just about plugging it in; it’s about verifying each link in the communication chain, from the power source to the software on your phone. A methodical approach will save you countless hours of troubleshooting down the line.
- Verify USB Power: First, ensure your car’s USB port meets the adapter’s minimum power requirement, which is typically 5V/1A. Check your owner’s manual or use a USB multimeter for a precise reading. An underpowered port is a primary cause of random disconnections.
- Update Operating Systems: Ensure both your phone and the CarPlay/Android Auto app are updated to the latest stable OS version. Mismatched software versions can cause compatibility conflicts.
- Prioritize Chipset Quality: When buying an adapter, specifically look for models built with a Qualcomm chipset (like the SM6350 or SM6115). These are engineered for better thermal management and more stable wireless performance than generic chips.
- Check for Firmware Updates: Before purchasing, verify that the adapter supports firmware over-the-air (FOTA) updates. This allows the manufacturer to push bug fixes and improve compatibility over time.
- Monitor Initial Performance: During the first week of use, actively monitor the connection. Note any patterns in disconnections or lag—do they happen during calls, when using specific apps, or on bumpy roads? This data will be crucial for any further troubleshooting.
Mise à jour à distance : faut-il la faire tout de suite ou attendre les retours ?
Over-the-air (OTA) updates are a double-edged sword. They promise new features and crucial bug fixes delivered directly to your car, but they also carry the risk of introducing new problems, from minor UI glitches to « bricking » the entire infotainment system. Deciding when to hit « Install » isn’t a simple yes-or-no question; it’s a risk management decision. From an IT support perspective, you should never install a major update without first understanding its purpose and potential impact.
An update labeled « critical security patch » should be treated with more urgency than one that « improves menu animations. » Likewise, an owner of a brand-new vehicle under warranty can afford to be an early adopter, while someone with an older, out-of-warranty car should be more conservative. A good practice is to wait a week or two after an update is released and check online forums for your specific car model. Let the early adopters be your beta testers. This waiting period allows the community to identify any widespread issues, saving you a potential headache.
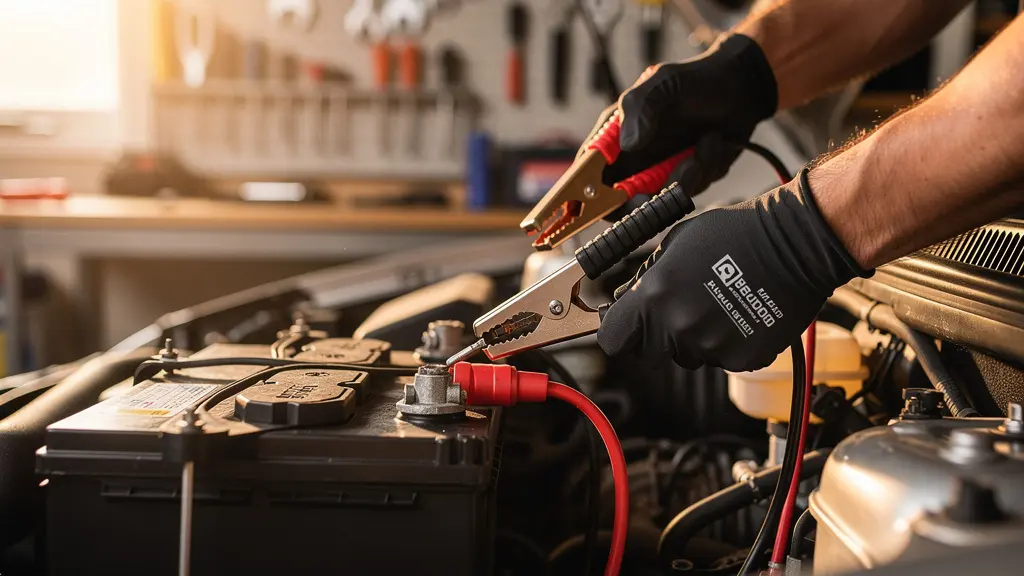
Before initiating any update, you must ensure the car’s power supply is stable. An OTA update is like open-heart surgery for your car’s electronic brain; a power interruption mid-installation can cause catastrophic data corruption. As shown above, connecting a battery tender is a non-negotiable safety protocol, especially if the update is large and the car’s battery isn’t brand new. The following framework helps you decide the best course of action based on your personal risk profile.
| User Profile | Technical Comfort | Car Age | Update Type | Recommendation |
|---|---|---|---|---|
| Conservative | Low | 5+ years | Minor feature | Wait 2-3 weeks |
| Moderate | Medium | 2-5 years | Bug fixes | Wait 1 week |
| Early Adopter | High | < 2 years | Security patch | Install immediately |
| Any | Any | Any | Critical safety | Install immediately |
Pourquoi votre batterie se vide-t-elle si la voiture reste garée 3 jours ?
You park your car for a long weekend, and when you return, the battery is dead. The common assumption is a faulty battery, but in a modern vehicle, the more likely culprit is a parasitic drain. This occurs when one or more of the car’s electronic modules fail to enter a low-power « sleep mode » after the engine is turned off. The infotainment system, keyless entry modules, and built-in GPS are common offenders, continuing to draw a small amount of current that, over several days, is enough to drain the battery completely.
Understanding the difference between normal and excessive drain is crucial for diagnosis. All modern cars have a minimal parasitic draw to maintain clock settings, security systems, and radio presets. According to industry standards, a draw of 50-85 milliamps (mA) is considered normal. However, if a module is stuck, this draw can easily exceed 100mA, which is enough to kill a healthy battery in just a few days. The challenge is identifying which specific circuit is causing the problem.
This isn’t a problem you can solve by simply restarting the car. It requires a systematic diagnostic approach to isolate the faulty circuit. With a basic multimeter, you can perform the same test a professional mechanic would, pinpointing the source of the drain and saving yourself a costly diagnostic fee at the dealership. This process involves measuring the total current draw and then pulling fuses one by one until the draw drops, revealing the problematic circuit.
Your action plan: DIY Parasitic Drain Test for Beginners
- Turn off all accessories (lights, radio, climate control) and close all doors. Wait at least 30 minutes to allow all electronic modules to enter their sleep mode.
- Set a digital multimeter to the DC Amps (10A) setting. Disconnect the negative battery terminal and connect the multimeter in series between the terminal and the battery post.
- Read the current draw on the multimeter. A reading under 0.05A (50mA) is typically acceptable. Anything consistently over 0.10A (100mA) indicates a significant parasitic drain.
- If the draw is high, begin pulling fuses one at a time from the fuse box. Start with fuses related to the infotainment system, radio, and interior lights. After pulling each fuse, check the multimeter.
- When you pull a fuse and the current draw drops significantly, you have found the culprit circuit. Investigate that specific circuit for faulty modules, stuck relays, or malfunctioning aftermarket accessories.
Comment effacer vos contacts et trajets GPS avant de vendre votre voiture ?
Selling your car involves more than just a physical cleaning; it requires a thorough digital detailing. Your infotainment system stores a vast amount of personal data, including your home address, contact list, call history, and detailed GPS logs of your every move. Leaving this data on the system when you sell the car is a significant privacy risk. Many owners assume that a simple « factory reset » from the settings menu is enough, but this is a dangerous misconception. A factory reset doesn’t always erase everything.
Think of it like decommissioning a computer. You wouldn’t just delete the files; you would wipe the hard drive and log out of all associated cloud accounts. The same principle applies to your car. Paired Bluetooth devices, connected service accounts like MyBMW or Uconnect, and even saved HomeLink garage door codes can persist after a standard reset. These lingering connections could potentially give the new owner access to your personal accounts or even your home.
A proper data wipe requires a multi-step protocol to ensure every trace of your digital life is removed. This process of digital hygiene is non-negotiable for protecting your privacy. It involves systematically working through every layer of the system—the head unit itself, the associated cloud services, and the connections on your personal devices. Following a comprehensive checklist ensures you don’t miss a critical step and hand over the keys with complete peace of mind.
- Perform a Factory Reset: This is your first step. Navigate to the infotainment system’s settings menu and find the « Factory Reset » or « Erase All Data » option.
- Log Out of Connected Services: Go to the websites or mobile apps for your car’s connected services (e.g., Mercedes Me, FordPass) and remove the vehicle from your account. This severs the link between the car and your personal cloud data.
- Clear HomeLink Codes: Erase all programmed garage door opener codes. This is usually a separate process done by holding down the outer two HomeLink buttons.
- Unpair All Bluetooth Devices: Manually delete every phone, tablet, and audio player from the car’s list of paired devices, and also clear the pairing history.
- Delete Wi-Fi Networks: If your car connects to Wi-Fi, go into the network settings and delete all saved networks and their passwords.
- Revoke Access from Your Phone: On your smartphone, go into the Android Auto or CarPlay settings and remove your old car from the list of recognized vehicles.
- Remove Physical Media: Don’t forget to remove any USB drives or SD cards you may have left in the media slots.
Réparation d’écran tactile : l’alternative économique au remplacement complet
When a touchscreen becomes unresponsive, registers « ghost touches, » or stops working entirely, a dealership’s first and often only recommendation is to replace the entire infotainment head unit—a repair that can easily cost over a thousand dollars. From a technician’s standpoint, this is often overkill. The root cause is rarely the entire unit; more often, it’s just a single, inexpensive component: the digitizer. The digitizer is the thin, transparent layer that sits on top of the LCD screen and detects your touch. It’s the part that fails, not usually the expensive display underneath.
Understanding the anatomy of your screen is key to an economical repair. The LCD is responsible for displaying the image, while the digitizer is responsible for registering touch input. If your screen still displays a perfect image but doesn’t respond to your finger, the problem is almost certainly the digitizer alone. This component can often be purchased online for under $100 and replaced with moderate DIY skills, saving you a significant amount of money.
The first step in any hardware repair is a proper triage. You must accurately diagnose the problem to apply the correct fix. Is it a software glitch that a hard reboot can fix, or a true hardware failure? And if it’s hardware, is it the digitizer, the LCD, or something else? The following guide helps you diagnose the symptom and understand the likely cost and difficulty of the repair, empowering you to make an informed decision instead of blindly accepting a full unit replacement.
This table acts as a diagnostic guide to help you identify the likely point of failure based on the symptoms your screen is exhibiting. As an analysis of repair options from various electronic repair hubs shows, correctly identifying the failed component is the key to a cost-effective solution.
| Symptom | Problem Component | Repair Cost | DIY Difficulty |
|---|---|---|---|
| Screen displays correctly but doesn’t respond to touch | Digitizer only | $20-60 | Moderate |
| Ghost touches or partial response | Digitizer or delamination | $20-100 | Moderate |
| Black screen but buttons work | LCD display | $100-300 | High |
| Screen bubbling/sticky residue | Delamination (heat damage) | $50-150 | High |
L’erreur d’inattention liée aux écrans tactiles qui cause 30% des accrochages urbains
While software bugs and hardware failures are frustrating, the most dangerous issue related to touchscreens is user-induced distraction. Interacting with a complex menu system while driving, even for a few seconds, takes your eyes off the road and your cognitive focus away from the task of driving. This isn’t a minor issue; safety research indicates that up to 30% of urban fender-benders involve some form of driver distraction originating from touchscreen interaction. The system isn’t faulty, but our use of it is.
The solution is not to avoid the technology, but to implement a strict usage protocol, much like a pilot’s « sterile cockpit » rule during takeoff and landing. A pre-drive sterile cockpit routine means completing all complex interactions with the infotainment system *before* you shift the car into drive. This includes setting your destination, queuing your music or podcast, and adjusting the climate controls. The goal is to minimize any need to dive into sub-menus while the vehicle is in motion.
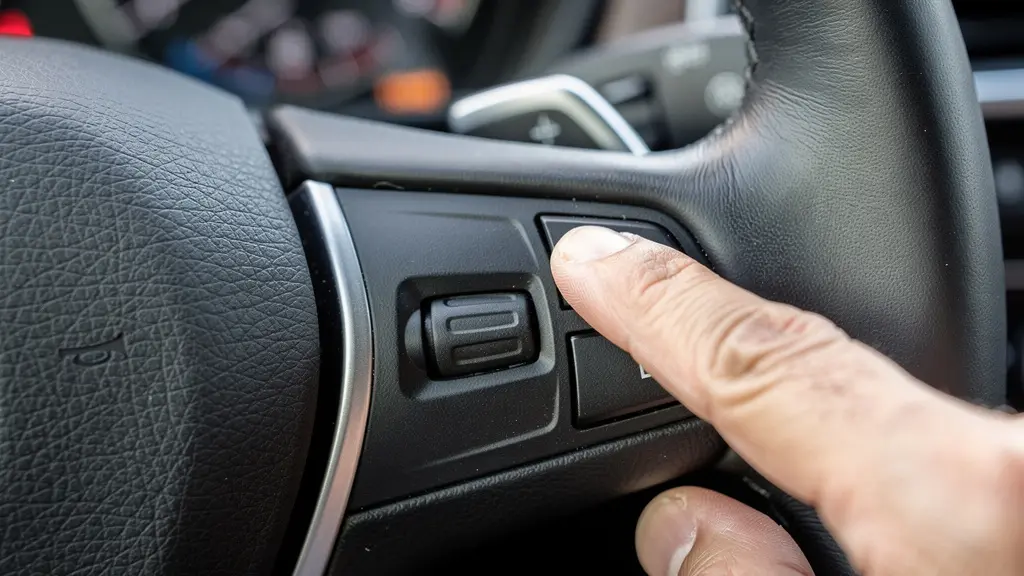
Once you are driving, your primary interface should shift from the touchscreen to the physical buttons on your steering wheel. As the image above illustrates, these controls are designed for tactile, eyes-free operation. They allow you to perform essential tasks like changing tracks, adjusting volume, or answering a call without looking away from the road. Make a conscious effort to learn and use these buttons. This simple change in habit can dramatically mitigate the risk of distraction and is a core tenet of responsible system use.
- Complete Navigation Setup: Enter and confirm your destination in the GPS before shifting out of Park.
- Queue Your Media: Select your playlist, album, or podcast episode while the car is stationary.
- Set Climate Controls: Adjust the temperature and fan speed to your liking, or set it to ‘Auto’.
- Configure Shortcuts: If your system allows, configure on-screen shortcuts for your most-used functions for one-touch access.
- Enable Voice Commands: Familiarize yourself with key voice command phrases for hands-free operation.
Les supports magnétiques sont-ils assez puissants pour les gros smartphones ?
Magnetic phone mounts offer convenience, but with today’s increasingly large and heavy smartphones, a common concern is whether the magnet is strong enough to hold the device securely, especially on bumpy roads. The answer isn’t a simple yes or no; it depends entirely on the grade and configuration of the magnets used in the mount. Not all magnetic mounts are created equal, and choosing the wrong one can lead to your expensive phone taking a tumble.
The strength of a magnet is rated by its grade, typically a number like N35, N48, or N52—the higher the number, the stronger the magnetic field. Budget mounts often use lower-grade (N35 or less) single magnets that are only suitable for smaller, lighter phones. For a large, modern smartphone like an iPhone Pro Max or a Samsung Galaxy Ultra, you should be looking for mounts that use high-grade N52 magnets or a specific array of magnets, like those found in official MagSafe compatible systems. These are engineered to handle weights exceeding 300 grams.
Another critical factor is the potential for interference with your phone’s internal components, specifically the Optical Image Stabilization (OIS) in the camera. Poorly designed magnetic arrays can interfere with these delicate mechanisms. This is why MagSafe systems, with their precisely spaced ring of magnets, are generally safer for newer iPhones, as they are designed to avoid this issue. When selecting a mount, it’s a matter of matching the mount’s engineering to the weight and technology of your specific device.
The following table, based on an analysis of magnetic mount technologies, breaks down the capabilities of different mount types, helping you make a data-driven choice for your device.
| Mount Type | Magnet Grade | Phone Weight Limit | OIS Interference Risk |
|---|---|---|---|
| Standard Single Magnet | N35-N42 | 200g | Medium |
| MagSafe Array | N48-N52 | 300g+ | Low (designed spacing) |
| Premium Multi-Magnet | N52 | 350g | Low |
| Budget Magnetic | < N35 | 150g | High |
Key takeaways
- A stable infotainment system relies on a healthy digital ecosystem: quality hardware, managed software, and stable power.
- Diagnose, don’t guess. Use systematic checks for parasitic drain or screen hardware failure before attempting a fix.
- Proactive management, like pre-drive routines and cautious updates, prevents more problems than reactive fixes solve.
Comment désactiver les alertes sonores intrusives sans compromettre la sécurité ?
Modern cars are filled with chimes, beeps, and warnings for everything from an unbuckled seatbelt to a potential forward collision. While these alerts are designed for safety, an endless barrage of non-critical notifications can lead to « alert fatigue, » causing the driver to tune out all sounds—including the important ones. The solution isn’t to disable all driver aids, but to perform an alert triage. This involves customizing the system’s notification settings to prioritize what is truly essential while muting or lowering the volume of what is merely advisory.
From a system configuration perspective, you must differentiate between three categories of alerts. Critical alerts, such as Forward Collision Warning or Rear Cross-Traffic Alert, must always remain on at full volume. These are your non-negotiable lifesavers. Advisory alerts, like Lane Departure Warning, are helpful but can sometimes be overly sensitive in city driving. For these, consider reducing the volume or switching the notification from an audible chime to a haptic vibration in the steering wheel. Finally, nuisance alerts, such as speed limit warnings or points-of-interest notifications, can often be safely disabled entirely without compromising safety.
This level of customization is usually not found in a single menu. You may need to explore different sections of the infotainment settings, often under headings like « Sound, » « Guidance, » or « Driver Assist. » By taking the time to configure these settings methodically, you can create a calmer, less distracting driving environment while ensuring that the most critical safety nets remain firmly in place. This is not about disabling safety; it’s about optimizing the human-machine interface for maximum effectiveness.
- Categorize Alerts: Identify which alerts are critical (Forward Collision, Blind Spot), advisory (Lane Departure), and nuisance (Speed Warning). Critical alerts must stay on.
- Adjust Advisory Alerts: For lane departure or similar warnings, look for an option to reduce the alert volume or change it to a steering wheel vibration instead of a sound.
- Mute Nuisance Alerts: Safely disable alerts that provide information you don’t need, such as speed limit notifications if you are already vigilant.
- Explore All Sound Menus: Don’t just look in the « Driver Assist » menu. Individual volume controls for navigation guidance and system sounds are often located in separate « Sound » settings.
- Use Contextual Muting: Some systems allow you to create profiles (e.g., « City » vs. « Highway ») with different alert settings, or temporarily mute alerts in specific situations like a construction zone.
- Test in a Safe Environment: After making changes, take a short drive in a low-traffic area to ensure the settings behave as you expect before relying on them in heavy traffic.
Now that you have the tools and the mindset of a troubleshooter, apply this systematic approach the next time your system acts up. Start by identifying the root cause, not just the symptom, to take back control of your car’s technology.